Compile and flash
After setting up the compiling environment and downloading the source code, you can compile the source code. After compiling and packaging, you can update the packaged firmware to the device. This article mainly introduces the methods of compiling and programming.
*For the method of building a compilation environment, please refer to::Tina Compilation environment configuration
*For the source code download method, please refer to:Get Tina SDK
Compile and package
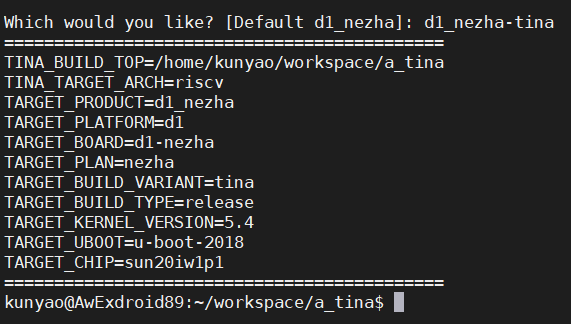
The compilation and packaging commands are as follows:
source build/envsetup.sh
lunch d1_nezha-tina
make -j32
pack
Among them:
- source build/envsetup.sh : Get environment variables
- lunch D1-H_nezha-tina chooses
D1-H_nezha-tinascheme, or you can just lunch directly without adding parameters, so there will be options to choose, among whichlunch D1-H_nezha-tinais the standard scheme ofD1-H_nezha-tina, and `lunch D1-H_nezha_min-tina can only make the system run The smallest system scheme. - make -j32 : Compile, where the number parameter after -j is the number of threads used for compilation, which can be selected according to the actual situation of the PC used for compilation by the developer.
- pack : Pack, pack the compiled firmware into a firmware in .img format, the firmware path is
/out/d1_nezha-tina/tina_d1-nezha_uart0.img.
Each time you open a ubuntu terminal, you only need to do the operation of obtaining environment variables and selecting the scheme. When the terminal is compiled multiple times, you do not need to do the first two steps, just make -j* directly.
Flash
Flash, means download the compiled and packaged firmware to the device
Flash method
Allwinner provides developers with a variety of programming methods and tools:
(1) PhoenixSuit: The programming tool for Windows-based systems. It is the most commonly used programming tool. Connect the PC and the development board through the data cable to burn the firmware to the development board. It supports partition programming, suitable for development and small Large-scale production use. It is recommended that developers use this tool for firmware upgrades during development.
(2) LiveSuit: A programming tool based on the Ubuntu system. Connect the PC and the development board through a data cable, and burn the firmware to the development board, that is, the PhoenixSuit of the Ubuntu version, which is suitable for the development and programming of Ubuntu system developers.
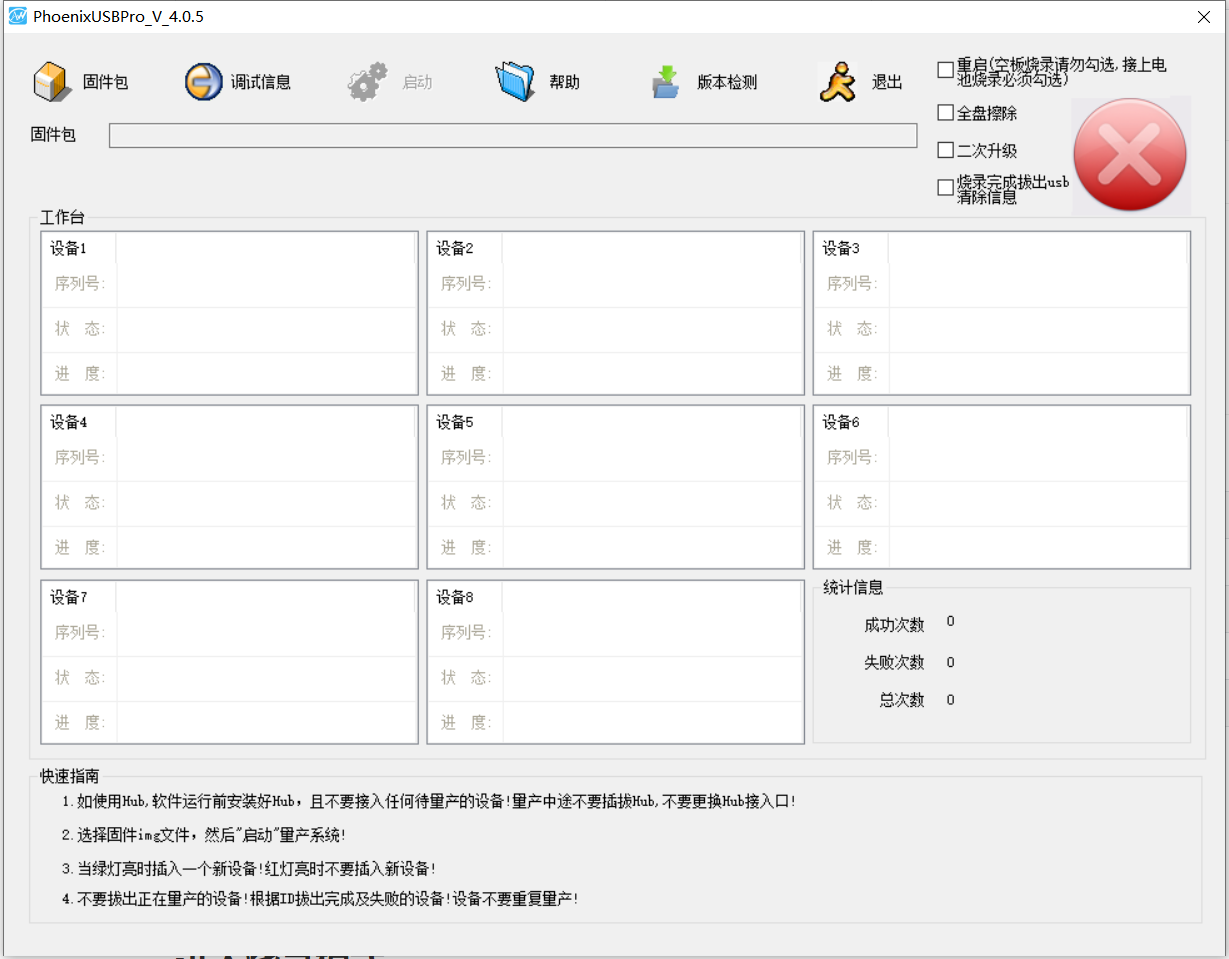
(3) PhoenixUSBpro: a programming tool for Windows-based systems. Connect the PC and the development board through a data cable to burn the firmware to the development board. A PC can connect to 8 devices at the same time, and they can be controlled separately for programming. Mass production on the production line. (As shown below)
(4) PhoenixCard: A mass-production SD card creation tool based on Windows, which can make ordinary .img firmware into SD card mass-production firmware. Insert mass-production SD card into the device during production and it will automatically burn the firmware, applicable Mass production of equipment with SD card slot.
(5) Mass programming and production of storage devices: Use proprietary equipment to program the firmware to unattached storage devices (such as emmc, nand, nor, etc.) in advance, and then mount them on the machine to improve the production efficiency of the equipment. The original factory and Allwinner's custom-made equipment need to be integrated before the storage device, which is suitable for mass production of ultra-large-scale products.
Introduction to the use of PhoenixSuitv
The following mainly introduces the method of programming with PhoenixSuit. The programming methods of LiveSuit and PhoenixUSBpro are similar.
PhoenixSuit download link:PhoenixSuit
At the same time need to install Allwinner USB driver, download link: Allwinner USB drivar
*Enterprise developers will also install the Allwinner USB driver when installing APST, so there is no need to install it separately
Specific steps are as follows:
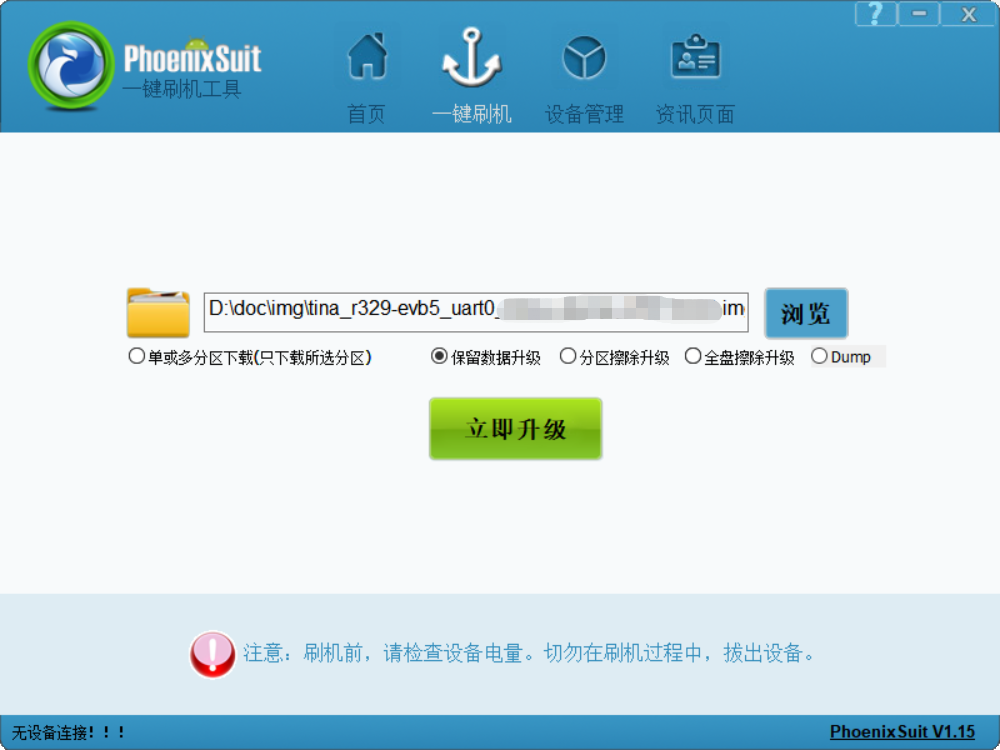
(1) Open PhoenixSuit, when the device is powered on and plugged into the USB to connect to the PC, PhoenixSuit will prompt to recognize the device;
(2) Click one-key flashing-browse to select the firmware to be burned;
(3) Click to Flash. At this time, a restart command will be sent to the device via USB, and the device will restart with the programming logo, and enter the programming mode during the restart phase;
(4) When the device restarts to boot, it will automatically burn and write, you can see the progress bar of PhoenixSuit is moving;
(5) The programming is successful and the device restarts.
Empty device programming
When the device is programmed for the first time (that is, there is no system in the device), the PC opens the programming tool, the device is inserted into the USB, and the programming tool will automatically pop up the programming prompt. At this time, press the YES button to start programming (requires advance Select the firmware to be burned in the firmware).
Hold down the Fel button to flash
There is a fel button in the middle of the front of the development board. After the PC opens the programming tool, press and hold the fel button and then plug in the USB to power on. At this time, it will enter the programming mode like an empty device.
*Prompt: When the PC recognizes that the device pops up a prompt, you can release the fel key without having to press it all the time
Flash device which has firmware already
For devices that have already flash firmware, during the development process, you can enter the programming restart command reboot efex in the serial port or ADB terminal to restart the device. At this time, the device will restart and automatically enter the programming mode during the startup process. The subsequent programming process is the same as above Introduction to the use of PhoenixSuit
*For the debugging methods of serial port and ADB, please refer to: USB and serial debug
Flash with abnormal device
During the development process, it may happen that the device burns the wrongly configured firmware, which causes the device to start abnormally. At this time, the device cannot be started normally, and the device cannot be controlled normally. This requires the device to enter the burning mode . There are two commonly used methods:
Press and hold the "2" key on the PC keyboard
When the device is starting, press and hold the "2" of the PC keyboard in the serial terminal and input "2" continuously. If the input of "2" is checked when the device is started, it will automatically jump to the programming mode. As shown in the figure (it is really pressing the "2" of the keyboard, many new developers do not understand this hidden operation):

Short Nand
When the device is is starting, use tweezers or a Dupont cable to short the power supply pins of Nand (the two pins on the lower right foot), so that the device will not be able to detect the existence of Nand during the startup process, and mistakenly think that this is an empty film , In this way, the device will automatically enter the programming mode according to the process of starting the blank film. As shown in the figure:
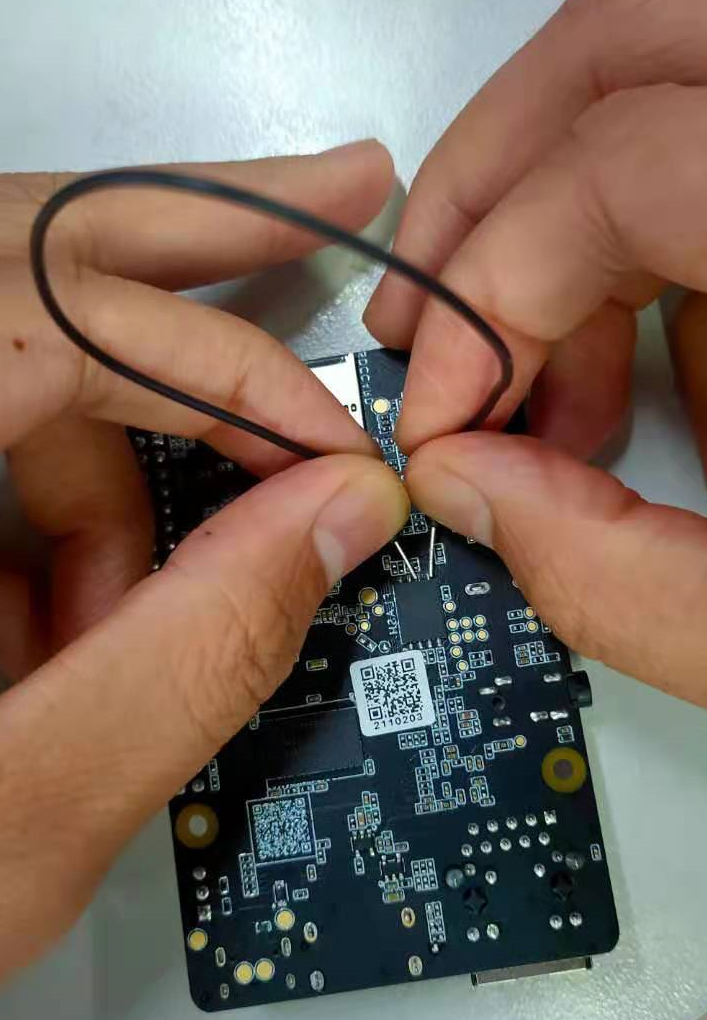
*Prompt: When the PC recognizes the device pops up a prompt, you can loosen the shorted Dupont line without having to keep shorting it
Advanced compilation operations
If you do not need to compile the entire system completely, you can also compile some modules, such as separately compiling boot0, separately compiling uboot, separately compiling the kernel and separately compiling a certain package, etc. The Tina Linux environment provides corresponding shortcut commands
- Compile boot0 and uboot separately:
mbootcan be used in any directory of Tina - Compile boot0 separately:
mboot0, which can be used in any directory of Tina - Compile uboot separately:
mubootcan be used in any directory of Tina - Compile the kernel separately:
mkernel, which can be used in any directory of Tina - Compile a package separately:
mm, which can only be operated under the compiled package path. If the package path istina/package/utils/rwcheck, you need to enter thetina/package/utils/rwcheckpath and enter the mm command to compile it. The path of the corresponding installation package is undertina/out/d1-nezha/packages/base - Compile a software package in the root directory:
make <pkg url>/install, you need to operate in the root directory, such as makepackage/utils/rwcheck/install - Clear the temporary files of the application package in the root directory:
make <pkg url>/clean, you need to operate in the root directory, such as makepackage/utils/rwcheck/clean